Barbell Back Squat: Benefits, Form, & Muscles Worked
Most experts consider the back squat the “king of exercises.”
It gets this moniker because it’s perhaps the single best exercise for developing every major muscle group in your body.
That’s only true if you do it correctly, though. Fortunately, that’s precisely what you’ll learn in this article.
- What Is the Barbell Back Squat?
- Back Squat: Benefits
- 1. It trains several major muscle groups.
- 2. It improves athletic performance.
- 3. It allows you to lift heavy weights.
- Back Squat: Form
- Step 1: Set Up
- Step 2: Descend
- Step 3: Squat
Table of Contents
What Is the Barbell Back Squat?
The barbell back squat (or “BB back squat”) is a leg exercise that involves squatting with a barbell across your upper back.
There are two ways to position the bar on your back while you squat:
- The high-bar position, where the bar rests on your upper traps
- The low-bar position, where the bar rests between the mid traps and rear deltoids
Here’s how they look:
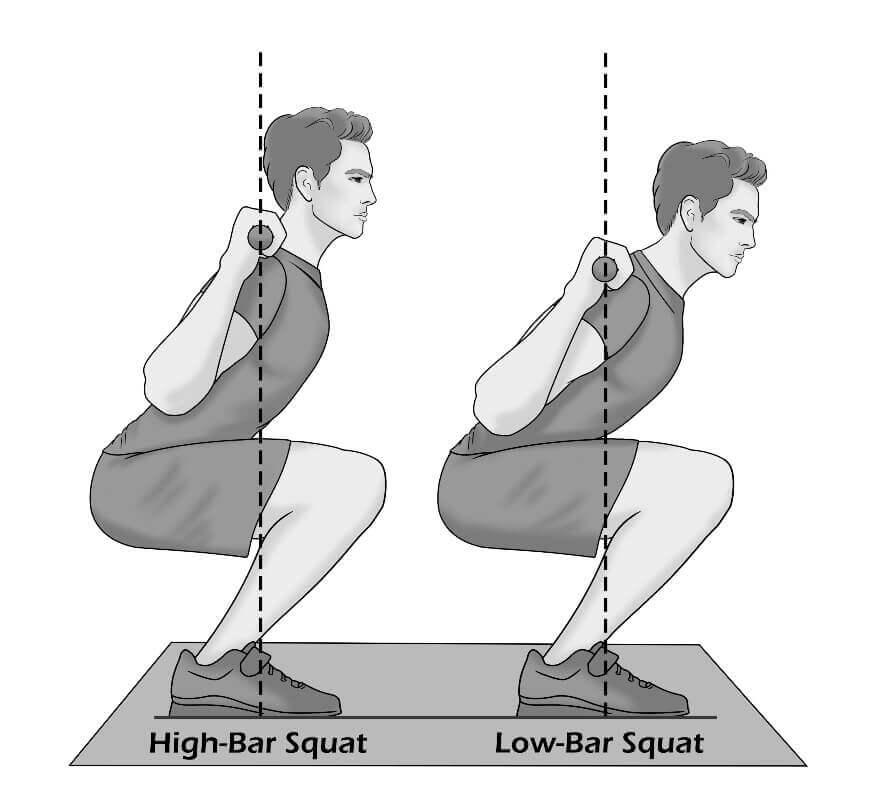
Because the low-bar back squat allows you to leverage your large leg muscles better and lift more weight, I recommend beginners start with the low-bar variation. As such, that’s the squat variation we’ll focus on in this article (and the version I recommend in my fitness books for men and women, Bigger Leaner Stronger or Thinner Leaner Stronger).
However, if you find the low-bar squat uncomfortable on your shoulders and wrists, the high-bar squat is a perfectly viable alternative.
Back Squat: Benefits
1. It trains several major muscle groups.
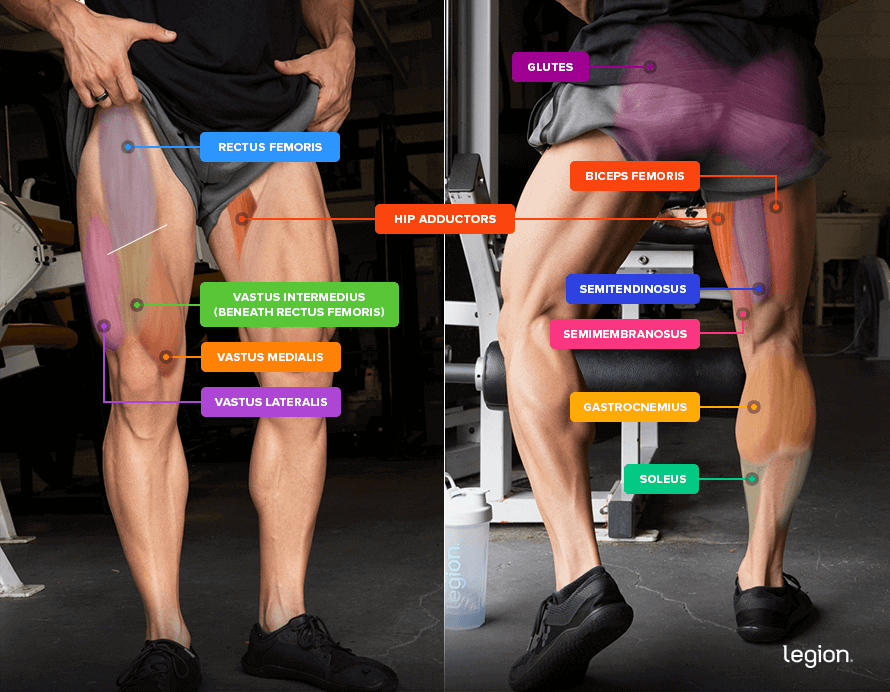
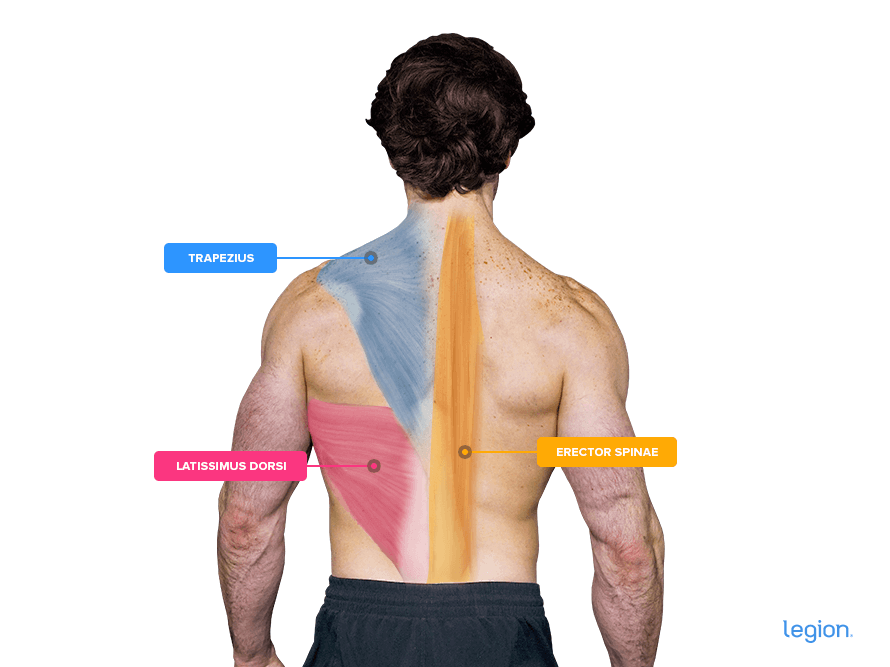
While the back squat with a barbell is primarily a leg exercise, many also consider it a full-body exercise because it trains almost every major muscle group in your body.
Specifically, the main muscles worked by the back squat are the quadriceps, glutes, erector spinae, latissimus dorsi, trapezius, calves, and abs.
2. It improves athletic performance.
The back squat improves your athletic performance in three ways:
- It helps you develop lower-body power, speed, and strength.
- It trains “hip extension” (moving your thighs away from your upper body), which improves your performance in sports that involve running, jumping, climbing, and so forth.
- It helps you build lower-body stability, making you less prone to injury, so you can spend more time competing and less on the sidelines.
3. It allows you to lift heavy weights.
The back squat lets you lift heavier weights than most other exercises and activates more muscle groups across your entire body, making it fantastic for building muscle and strength and burning fat.
It also allows you to progress regularly, which is the best way to maximize the muscle- and strength-building, and fat-burning benefits of weightlifting.
Back Squat: Form
The best way to learn how to back barbell squat is to split the exercise into three parts: set up, descend, and squat.
Step 1: Set Up
Adjust the hooks in a squat rack so the bar is at the height of your midchest like this:
Overhead-press-vs-military-press.png
If your squat rack has safety arms or bars, set them to about the height of your midthigh. Load the bar with your desired amount of weight (or not, if the bar alone is enough).
Grip the bar with your palms facing forward and your hands about 4-to-8 inches wider than shoulder-width apart.
Place your feet underneath the bar a little wider than shoulder-width apart. Then, push your torso under and up against the bottom of the bar so it rests against the back of your shoulders.
Pull your shoulder blades together and down to create a little “shelf” out of the bony protrusions of your shoulder blades, and then maneuver your torso so the bar nestles into this shelf.
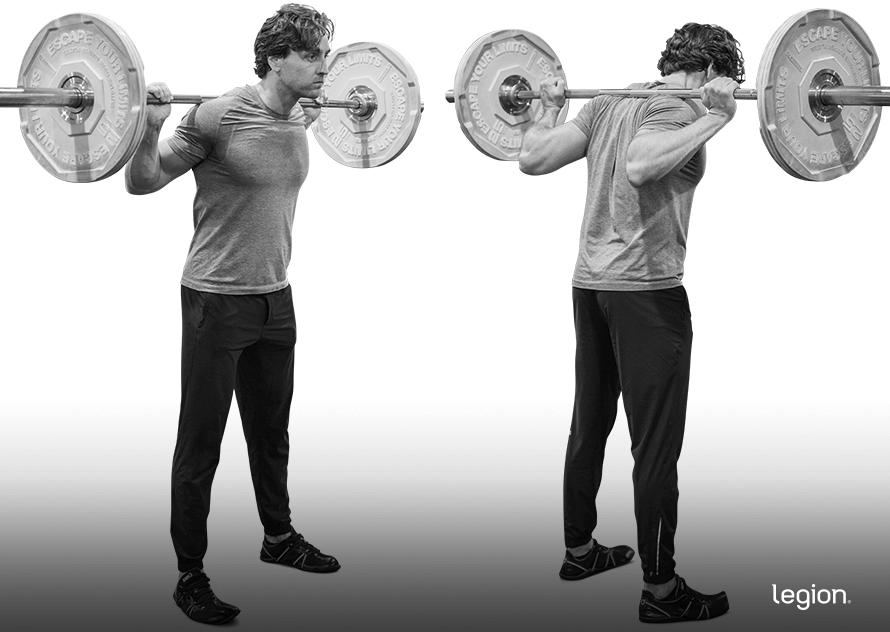
Unrack the bar by standing up and taking one step back with each foot (one at a time). Adjust your squat stance so that your feet are a little wider than shoulder-width apart, and point your toes out about 20-to-25 degrees (around one and eleven o’clock).
Here’s what you should look like from the front and back:
Step 2: Descend
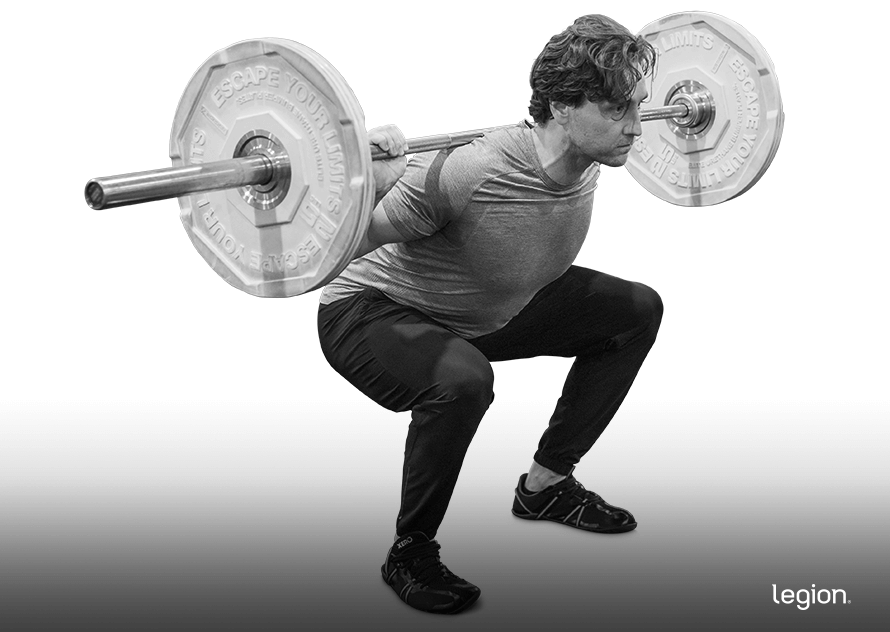
Take a deep breath into your stomach, keep your torso upright, push your chest out, brace your core, then push your hips back and bend your knees simultaneously. Keep sitting down until your thighs are parallel to the floor or slightly lower.
If you find back squatting with a full range of motion challenging, use the stretches in this article to improve your hip and ankle mobility and perform squat variations that allow you to more easily squat deeply (e.g., Bulgarian split squat, front squat, and goblet squat) until your flexibility improves.
Squatting in squat shoes with a raised heel can also help. However, I don’t recommend elevating your heels on weight plates as this is unstable and can increase your risk of injury.
Here’s how you should look at the bottom of the back squat:
Step 3: Squat
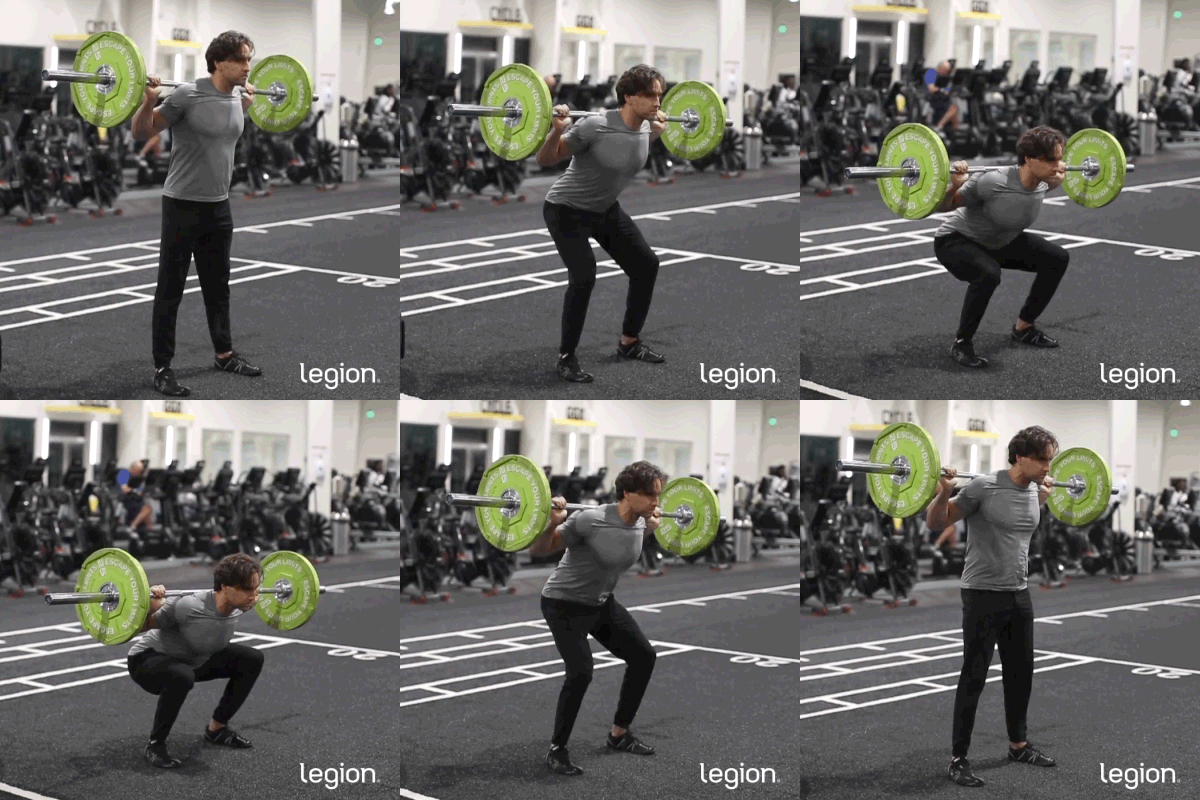
Drive your feet into the floor, ensuring your shoulders move upward at the same rate as your hips—a mirror image of what you did during the descent. About halfway up, push your hips forward and underneath the bar to return to the starting position.
Here’s how it should look when you put it all together:
The post Barbell Back Squat: Benefits, Form, & Muscles Worked appeared first on Legion Athletics.
https://ift.tt/M5YnE4i July 20, 2023 at 06:00PM Legion Athletics
Comments
Post a Comment